Table of Contents Show
Building your own shed can create a fulfilling experience. It offers a chance to save money while giving you the freedom to create a space that meets your requirements. By taking on this project, you gain not only a functional structure but also a feeling of achievement that comes with crafting something on your own.
This guide simplifies the task of shed framing, making it suitable for those who might not have much experience in construction.
Reasons to Consider Building Your Own Shed
One of the biggest advantages of constructing your own shed is the cost savings. By choosing to handle the work yourself, you eliminate the expense of hiring labor. This allows you to allocate your budget toward quality materials or other project enhancements.
Customization is another significant benefit. You have the flexibility to design the shed according to your unique needs and preferences. Whether you require extra storage space, a garden tool area, or a workshop, you can make your vision a reality.
The sense of accomplishment that comes from completing a project with your own hands is hard to match. As you see your efforts take shape, you gain pride in your work, and this feeling can motivate you for future DIY projects.
Facing the Challenges of Solo Shed Building
Building a shed on your own does come with its share of challenges. Handling heavy materials can be intimidating. Maneuvering large wall sections requires careful planning and the right techniques to ensure safety and efficiency. Time management is also crucial; you need to schedule tasks wisely to maintain momentum and avoid burnout.
How This Guide Simplifies the Process
This guide is structured to ease the process of building your shed by breaking it down into smaller, manageable tasks. Each section will provide clear, step-by-step instructions along with practical tips aimed at helping you work effectively on your own.
By mastering one part at a time, you will build confidence and skill, leading to the successful creation of your shed.h segment will include step-by-step instructions and practical tips for working alone.
How to Frame a Shed -Youtube Video Tutorial
For the video tutorial, please reference this link: How to Frame a Shed (One Section at a Time) – YouTube
1. Planning and Material Selection
Optimizing Shed Dimensions for Solo Building
When planning to build a shed on your own, choosing an 8ft section approach can greatly simplify the process. This method allows for easier handling of materials, reducing the risk of injury and making the project more manageable.
By limiting the size of the sections you work with, you can minimize the weight you are lifting at any one time. It is also important to keep an eye on the costs associated with materials such as studs, plates, and sheathing. Staying within your budget is essential, so consider how these costs will affect your overall planning.
Selecting Appropriate Lumber and Fasteners
For walls that reach a height of 8 feet, it is wise to use 92 5/8″ studs. These studs fit perfectly when adding components like a top plate, a bottom plate, and an additional top plate to create a sturdy structure.
When choosing nails and screws, make sure to select options that match the thickness of the materials you are using. This ensures a secure build. It is best to avoid using pressure-treated wood whenever possible. This type of wood can retain moisture over time, which could lead to problems in keeping your shed dry and protected from the elements.
Material Quantity Estimation
Before you begin construction on a 16ft x 8ft shed, accurate calculations are necessary. Determine how many studs, plates, and sheets of material will be required for your build. It is wise to prepare for any potential shortages in the materials.
Having enough supplies on hand will help you avoid disruptions during the construction process. Proper estimation ensures that your build progresses smoothly and on schedule.
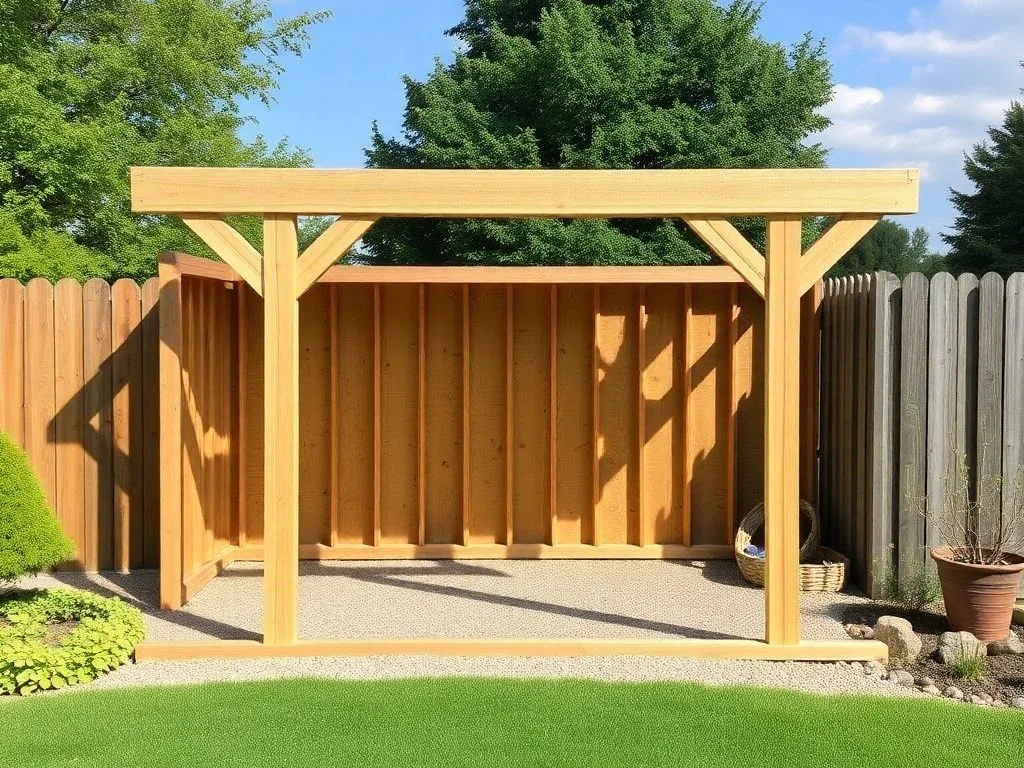
2. Building the 8ft Wall Sections
Laying Out the Wall Frame: A Step-by-Step Process
- Mark the Stud Placement: Begin by marking the stud placement on the bottom plate. Use 16″ centers to ensure the proper spacing between the studs. This measurement is crucial for structural support and helps with insulation installation later.
- Attach the Top and Bottom Plates: Once marked, proceed to attach the top and bottom plates. Make sure they are aligned correctly and securely fastened. Proper attachment is vital for the wall’s strength.
- Use Staples for Alignment: Next, use staples to keep the studs aligned as you work. If your materials come with any staples, remove those to avoid complications during the assembly. The goal is to have a clean and accurate setup for your wall frame.
Fastener Placement for Strength and Stability
When it comes to securing the studs, use two nails for each stud, placing them every two inches. This spacing helps ensure that the wall remains stable. Do not cluster the nails in the middle of the studs, as this could cause twisting. Even distribution of fasteners contributes to the overall durability of the wall frame.
Assembling the Wall Sections: Tips for Solo Work
While assembling the wall sections, it can be helpful to use braces. These braces will hold the walls in place during the assembly process. If you are working alone, a hinged brace can be especially useful. This type of brace allows you to lift the walls independently, making the process smoother.
To further ensure that the walls do not collapse while you work, employ temporary supports. These supports can hold the sections upright until they are securely fastened. With these strategies in place, you can create a strong and stable wall section efficiently.
3. Erecting and Securing the Walls
Lifting and Positioning Wall Sections: Solo Techniques
When it comes to lifting and positioning wall sections, having a helper can be very beneficial, especially for the first wall. However, if you are working alone, temporary braces can be a valuable tool to provide added support during the process.
Start by carefully lifting the wall section into place. Once it is in position, it is crucial to secure each wall section to the foundation with precision. This ensures that the walls are firmly anchored and will maintain their integrity over time.
Creating Strong Corner Joints
Corner joints are vital for the overall strength of the structure. Use screws to make any necessary adjustments to the positioning of the wall sections. This method allows for a secure fit that can easily be adjusted if needed. It is important to close any gaps between the wooden pieces. Doing so enhances the structural integrity of the wall and minimizes the risk of weakness later on.
Make sure to tighten all joints thoroughly. Ensuring that each joint is stable will contribute to the overall durability of the walls.
Temporary Bracing and Support Strategies
To enhance support while constructing the walls, consider incorporating additional 2×10 boards as temporary braces. These added elements can offer significant stability during the building process. It is essential to secure the walls effectively to prevent bowing and misalignment.
Maintaining proper alignment is crucial to achieving a straight and sturdy structure. Using these temporary bracing strategies during construction will help keep the walls in place and ensure a solid foundation for the rest of the building process.
4. Advanced Framing Techniques: Doors and Windows
Framing the Door Opening
When framing a door opening, it is crucial to calculate the correct dimensions carefully. Start by determining the size of the door. This includes accounting for both width and height. Next, incorporate jack and king studs to provide adequate support around the opening.
Jack studs are used to carry the load of the header, while king studs run from the top plate to the bottom plate on both sides. After setting up the studs, construct a header that spans the opening. The header will help transfer the weight above the door to the adjacent studs, ensuring stability and strength.
Framing Window Openings
Similar to doors, marking the locations for windows is an essential step in framing. Identify the height and width of each window. Using horizontal windows can help increase the amount of natural light entering the space and can enhance the overall workspace.
Once the locations are set, build headers above each window. These headers will support the wall above and distribute the weight evenly, preventing any sag or structural issues down the line.
Addressing Framing Challenges
Framing can present various challenges, including issues with warped lumber or misaligned structures. To tackle warped lumber, it is important to inspect each piece before use. If a board is bowed or twisted, consider using shims to correct alignment when installing.
For gaps and misalignments, ensure that each frame is level and plumb. Adjustments may be necessary to ensure that walls remain perfectly straight. Taking the time to address these issues will lead to a clean, professional finish in your construction project.
5. Completing the Frame and Finishing Touches
Adding Exterior and Interior Bracing
To ensure your structure is stable, adding cross-bracing is essential. This method involves installing diagonal braces between the frame members. Cross-bracing makes the frame much sturdier and helps resist shifting during strong winds.
Use additional 2×4 lumber for further reinforcement. These pieces can fit into the frame’s corners and along its edges to create a stronger hold. Focusing on strength is crucial, even if it means sacrificing a bit of appearance. A solid frame is more important for safety and long-lasting performance.
Using Vinyl Siding for Simplicity
Vinyl siding is an excellent choice for covering your building’s exterior. It is known for being cost-effective, which makes it a popular option among homeowners. Installing vinyl siding is straightforward and can save time and labor costs. Once the siding is in place, it provides a smooth, clean look. Its flexibility is also an advantage, as it hides minor flaws in the framing.
This means that uneven surfaces will not be visible after installation. Vinyl siding requires little maintenance and can withstand different weather conditions. This durability makes it a smart option for protecting your investment.
Conclusion: Your Own DIY Shed is Within Reach
Key Takeaways: Planning, Precision, and Patience
Building a shed is an achievable goal for anyone willing to put in the effort. The key to success lies in careful planning and precise execution throughout the project. While it is common to aim for high standards, especially with rough framing, it’s more important to prioritize structural stability.
Focus on making sure the shed is built to last rather than getting caught up in small details during the framing process. This project is accessible, even for those who are new to building.
Next Steps: Completing the Shed Construction
After the framing is done, the next major task is to install the roof. This step will protect the interior from the elements and ensure that your shed is functional.
Once the roof is secure, you can turn your attention to adding finishing touches. This may include painting the exterior, installing shelving, or adding any other enhancements that suit your needs.
After completing these steps, take a moment to enjoy your custom shed. You have created a space that is uniquely yours. Embrace the satisfaction that comes from building something with your own hands. With patience and dedication, constructing a shed is not just another task; it can be a rewarding experience that you will remember fondly.
FAQ:
Building your own shed can save you money by eliminating labor costs and allows for customization to fit your specific needs. Additionally, the experience provides a sense of accomplishment as you create a functional space with your own hands.
Some challenges include handling heavy materials, managing your time effectively, and ensuring safety during construction. It’s important to plan your tasks wisely and use techniques that make the lifting and assembly process easier.
This guide simplifies the shed building process by breaking it down into smaller, manageable tasks with clear, step-by-step instructions. It includes practical tips to help you build confidence and skill as you work through each section of the project.
For an 8ft wall section, you will need 92 5/8″ studs, top and bottom plates, and sheathing material. Make sure to select nails and screws that match the thickness of your materials for a secure build.
Inspect each piece of lumber before use. If you find warped boards, consider using shims to correct their alignment during installation. Ensuring that each frame is level and plumb is important for achieving a clean finish and structural integrity.