Table of Contents Show
Introduction
Ever wondered about the magic of adjustable storage shelves? They’re not just handy storage solutions, but also a great way to add character to your space! With the flexibility to change shelf heights as per your needs, these are indeed a boon for those who love to keep their spaces organized and clutter-free.
But wait, there’s more to it. The key to a strong and secure adjustable shelf lies in the proper installation process. And that involves finding studs and using wall anchors efficiently. Yes, you read that right! If you want your shelves to bear weight without collapsing, it’s essential to locate the studs in your walls and use wall anchors for added support.
And we’re here to help you with just that. This article will guide you through:
- Selecting the right type of shelving material and size
- Understanding how to find studs and effectively use wall anchors
- Constructing your own adjustable storage shelves
So are you ready to dive into the world of adjustable storage shelves? Let’s get started!
1. Understanding the Importance of Choosing the Right Type of Shelving and Size
When you’re looking for adjustable storage shelves, it’s important to find ones that fit your space perfectly. The materials and size you choose should work well both functionally and aesthetically. Here’s why this is so crucial.
Choosing Shelving: Material Matters
The material of your shelves affects how they will hold up over time and what they can support. Here are some common options:
- Wood: Classic and versatile, hardwoods like oak or maple are durable but heavy. Softer woods or particleboard are more affordable but may not handle heavy loads as well.
- Metal: Sleek and strong, metal shelves are great for heavy items. However, they can have sharp edges and may require more effort to install.
- Plastic: Lightweight and easy to move around, plastic shelves resist corrosion but may not be as sturdy for heavier objects.
Each material has its own strengths and is suited for different spaces, whether it’s wood adding warmth to a living room or metal in a garage filled with tools.
The Perfect Fit: Size of Shelves
Finding the right size of shelves is essential to avoid frustration later on. Consider these factors:
- Space: Measure your chosen spot carefully to make sure the shelves will fit in terms of width and height.
- Purpose: Think about what you’ll be storing on the shelves. Lighter items may require narrower shelves, while larger collections need broader and sturdier ones.
Best Types of Adjustable Storage Shelves for Different Items
Choosing shelves that suit what you’ll be storing is key. Here are some examples:
- Books: Look for strong, deep shelves—wooden ones can give a library-like vibe.
- Kitchen spices: An adjustable metal rack with good visibility can make finding ingredients easier.
- Toys: Plastic shelves are a good option for their durability and safety around children.
Remember, adjustable storage shelves can adapt to your changing needs over time—a feature that’s worth investing in.
If you’re still unsure about which shelves to choose, check out our article 16 Creative Ideas to Start Organizing Your Home for some inspiration. It might help you figure out how to organize your items and make a decision.
You’ve got this—finding shelving that fits your space and meets your needs is a satisfying step towards a more organized home. And don’t worry; we’ll soon talk about finding studs and using wall anchors effectively—because even the best shelf needs a solid foundation to shine!.
2. Tips for Finding Studs and Using Wall Anchors Effectively
Before you get excited about setting up your new adjustable storage shelves, let’s talk brass tacks—or should I say, studs and wall anchors? Securing your shelves to the wall isn’t just about making them look good; it’s also about safety and durability. Ever heard the horror stories of a fully loaded bookshelf crashing down in the middle of the night? Not on our watch!
Why Finding Studs is a Must-Do
Studs are like the hidden skeleton in your walls, providing a sturdy framework that can support weighty objects—like those heavy-duty shelves you’re itching to mount. Without studs, your wall might not be able to bear the load, leading to potential damage or even injury.
Techniques for Locating Studs:
- Electronic Stud Finders: These handy gadgets are like having X-ray vision. They detect changes in wall density, pinpointing where those elusive studs are hiding. Just glide one across the wall and voilà! The stud finder beeps or lights up when it crosses a stud.
- Tapping Method: Have a keen ear? Tap along the wall with your knuckle—where the sound goes from hollow to solid, you’ve likely found a stud.
- Visual Cues: Sometimes, you can play detective by looking at outlet placements (usually attached to a stud) or where the trim is nailed in (hint: there might be a stud behind those nails).
Anchors Away: Choosing the Right Wall Anchor
When studs aren’t available where you need them, wall anchors step in as the heroes. But remember, not all heroes wear capes—some come in different shapes and sizes like plastic anchors, toggle bolts, and molly bolts.
- Plastic Anchors: These are perfect for light loads. Think picture frames or small decor items.
- Toggle Bolts: Now we’re talking heavier duty. Toggle bolts can hold more weight and are great for medium-sized shelves.
- Molly Bolts: For serious business—like your extensive vintage vase collection—Molly Bolts provides robust support.
How to Nail It with Wall Anchors: A Step-by-Step Guide
- Drill Away: Start by drilling a hole slightly smaller than your anchor size.
- Anchor Time: Tap that plastic anchor in with a hammer until it’s flush with the wall.
- Screw It In: Insert a screw into the anchor, leaving enough out to hang or mount your item.
- For Toggle & Molly Bolts: Make sure to insert them through your item bracket first before pushing into the wall and tightening.
Pro Tip: When using toggle bolts, remember they have wings that need to open on the other side of the wall—so don’t tighten them all the way until they’re snug against your bracket.
Common Mistakes to Avoid:
- Don’t use drywall anchors where you really need a stud; those precious family heirlooms deserve better!
- Oversized holes make for wobbly anchors; measure twice, and drill once!
- Tighten screws carefully—not too loose, not too tight.
Armed with this knowledge on finding studs and selecting appropriate wall anchors, you’re well on your way to creating a safe and stable home for all your trinkets, books, or whatever treasures you plan to display or store. With each step carefully executed, those adjustable storage shelves will be up in no time—and they’ll stay up!
3. How to Build Adjustable Storage Shelves in 5 Easy Steps
With your studs located and wall anchors ready, it’s time to move on to the exciting part — building adjustable storage shelves. But where do you start? Here are five easy steps to guide you through the process.
Step 1: Gathering the Necessary Tools and Materials
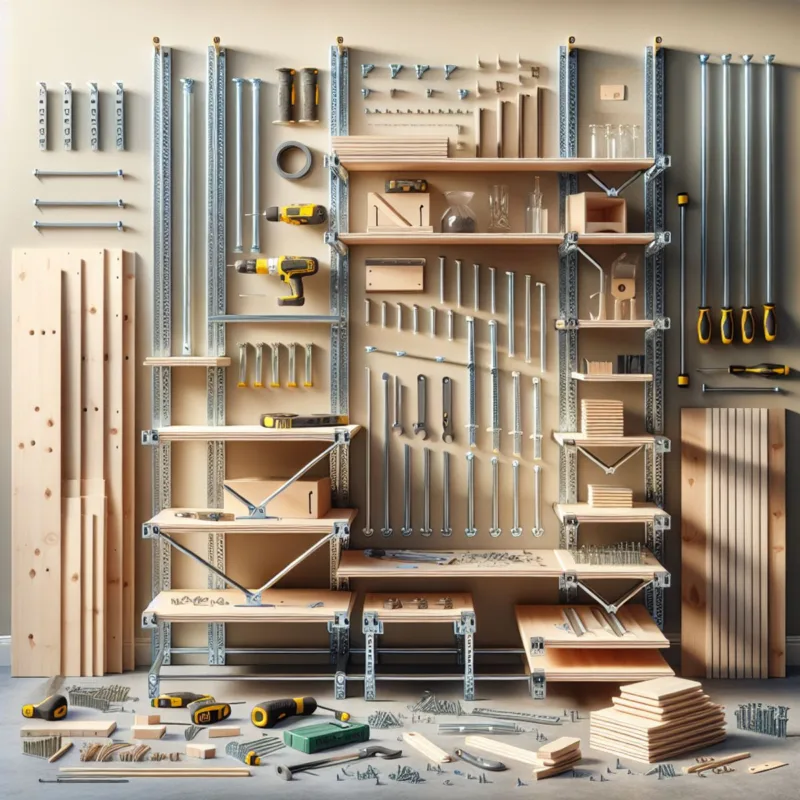
The first step in any DIY project is ensuring you have all the necessary tools and materials at hand. For building adjustable storage shelves, you’ll need:
- A saw (for cutting your shelving material)
- A drill
- Screws
- Brackets (also known as standards)
You might also find a level, stud finder, tape measure, and pencil useful for marking where your shelves will go. Our detailed guide on must-have DIY tools can help ensure you’re fully equipped for this task.
When selecting materials, there are a few key considerations to keep in mind:
- Shelving Material: The material for your actual shelves can make a significant impact on both their appearance and functionality. Wood can offer a warm, natural look but may require more maintenance than metal or plastic.
- Brackets: These are what hold up your shelves, so they need to be sturdy. They come in various sizes and styles, so pick something that suits your décor and can support the weight of your stored items.
- Screws: The type and size of screws you choose will depend on your wall material and the weight of your shelves.
Remember, investing in high-quality materials from the start can save you a lot of trouble down the line. You want your shelves to be sturdy and easily adjustable — not sagging under the weight of your belongings or hard to move when you want to switch things up!
So that’s step one done and dusted. We’ve got our tools, we’ve got our materials, and we’re ready to move on to the next stage. The next section will guide you through measuring and marking your wall for shelf placement. It’s all about precision from here on out!
Step 2: Measuring and Marking the Wall for Shelf Placement

When building adjustable storage shelves, precision is your best friend. You’re essentially drawing a map that will guide you toward a destination of symmetry and style. So grab your adjustable storage shelves tools, because it’s time to dive into the art of measuring wall shelf placement.
Why Accurate Measurements Matter
- Aesthetic Balance: Just like the perfect ingredients make a great recipe, precise measurements create an eye-catching shelving display.
- Functionality: It’s not just about looks; it’s also about ensuring that your shelves function well in the space they inhabit.
- Safety: Correctly measured distances mean your brackets will align with the studs, providing ample support for whatever you plan to store.
Measuring and Marking: A Step-by-Step Guide
- Get Your Tools Ready
You’ll need a tape measure, a level, a pencil, and possibly a stud finder. Make sure these are within arm’s reach before you start.
- Find and Mark Studs
If you haven’t already located the studs during the planning phase, now is the time. Use your stud finder and mark both edges of each stud where your shelves will go.
- Decide on Shelf Height
Think about what you’ll be storing on these shelves. Knee-level? Eye-level? The height should cater to both usage and visual harmony.
- Marking the First Bracket Location
Using your level, draw a vertical line along the center of where your first bracket will go. Ensure this is plumb—straight up and down!
- Horizontal Lines Are Key
Next up, decide on the distance between each shelf and mark horizontal lines across the studs where each shelf will rest.
- Bracket Spacing
Finally, measure out where each bracket or standard will be placed horizontally along these lines. Keep spacing even for consistency.
Remember to double-check everything. A second look never hurts when it comes to getting those shelves just right.
With all marks made, stand back and visualize how your adjustable storage shelves will look once installed. This visual assurance lets you proceed with confidence to the next steps of actual installation where those marks become the blueprint for your shelving success!
Step 3: Installing Shelf Standards for Easy Adjustment

Ready to take another step towards building your adjustable storage shelves? We’ve gathered our tools, measured and marked our wall, and now it’s time to install the shelf standards. These are crucial components that will enable easy adjustment of your shelves, providing you with flexible storage solutions.
First things first, let’s understand what shelf standards are. Essentially, they’re metal tracks that you attach to your wall. They have slots at regular intervals where you can insert brackets, upon which your shelves will rest. Two common installation methods include floating standards and bracket-mounted standards:
Floating Standards
These standards are mounted directly onto the wall and do not need any supporting brackets underneath. They provide clean lines and a minimalistic look but may not be as strong as their bracket-mounted counterparts.
Bracket-Mounted Standards
These involve additional supporting brackets fixed on the wall, enhancing the strength and stability of your shelving system. Though they might not offer as sleek a look as floating standards, they can support heavier loads making them ideal for substantial storage needs.
Now that we grasp the basics, let’s dive into how to install these shelf standards properly.
Step-by-step Guide to Installing Shelf Standards
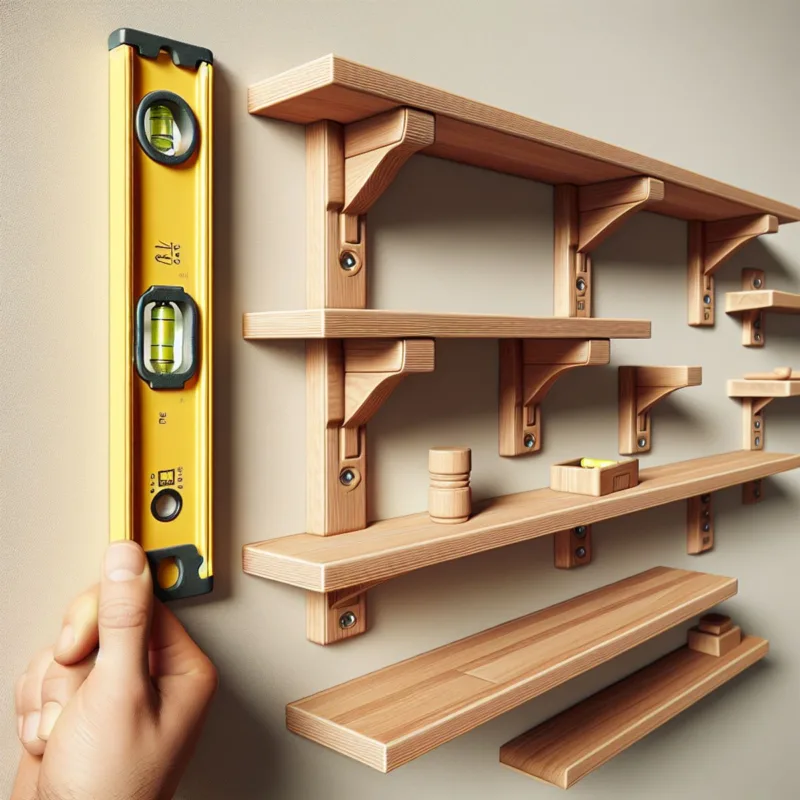
- Align Your Standards: Start by holding your standard against the wall where you previously marked for its placement. Make sure it aligns with the markings accurately and is perfectly vertical. You can use a level tool for this purpose.
- Mark the Screw Holes: Once aligned, mark the positions for screw holes on the wall through the holes in your standard. This will guide where you need to drill.
- Drill Pilot Holes: Using a drill bit smaller than your screws or wall anchors (if you’re not drilling into studs), make pilot holes at all marked positions.
- Install Wall Anchors: If you’re not drilling into studs, now’s the time to insert your wall anchors into the pilot holes. Gently tap them in using a hammer until they’re flush with the wall.
- Secure the Standard: Now, position your standard over the wall anchors or pilot holes and secure it using screws. Make sure it’s firmly attached and doesn’t wobble.
- Check for Levelness: Once you’ve installed one standard, use a level tool to mark the correct height for your second one. This ensures that your shelves will be perfectly horizontal.
- Repeat Process: Repeat the process to install all remaining standards ensuring each one is level and securely attached.
Remember, patience and precision are key here! Hasty installations can lead to uneven shelves or unstable structures, so take your time and do it right.
So, we’re done with installing shelf standards for our adjustable storage shelves! The next steps? We’ll be building the actual shelves and designing adequate support systems. Stay tuned for some useful tips and tricks as we continue our shelving journey together.
Step 4: Building the Shelves and Supports
Now that we’ve got our shelf standards securely installed, it’s time to turn our attention to building adjustable storage shelves and supports. This phase is where the magic happens – your shelves start taking shape!
Constructing the Actual Shelves
The first thing on our agenda is constructing the actual shelves. Remember, the materials you chose in Step 1? It’s time to bring them into play. If you’ve opted for wood, you’ll need to cut your boards to size. For those with metal or plastic shelving materials, ensure they’re cut according to your defined measurements.
Now, let’s not forget about aesthetics amidst all this functionality. Adding a trim to your wooden shelves can give them a polished and finished look. Even if you’re working with metal or plastic, there are trims available that can be attached for that extra touch of elegance.
Designing Adequate Support Systems
Next up is designing an adequate support system for your shelves. This essentially means figuring out how best to hold your shelves up in place securely. Adjustable brackets or cleats are excellent options that provide both strength and adjustability.
But before you rush off to purchase these items, take a moment to consider what will work best for your specific needs. Are you planning on storing light items or heavy ones? Can the wall material handle the weight? These are important questions that will help determine what type of support system suits your project best.
To illustrate this point, let’s consider an example comparing DIY versus pre-made adjustable shelving kits. A DIY project allows you complete control over every aspect – materials used, design, size, etc., but it does require some level of skill and effort. On the other hand, pre-made kits come with everything you need but may not offer as much flexibility in terms of design and sizing.
So, which one should you choose? Well, it really boils down to your personal preference, time availability, and skill level. If you’re up for a challenge and have the time to spare, a DIY project could be a fun and rewarding experience. However, if you’re short on time or aren’t that handy with tools, pre-made kits could be a lifesaver.
The key to successful shelving is understanding that every step of the process is important. From selecting the right materials to cutting them at the right size, each decision contributes to the final result. If you’re looking for some inspiration, check out these easy DIY wine racks for your wine cellar!
Step 5: Mounting the Shelves and Ensuring Stability
After creating your perfect shelves, it’s time to mount them to the installed standards. Don’t forget, that this is not just about aesthetics; we’re aiming for a sturdy, functional storage solution.
Attaching the Shelves
To begin with, align each shelf with its corresponding standard or track. Grab your screwdriver (or drill, if you prefer) and secure each shelf in place. An extra pair of hands can be super helpful here to hold the shelf steady while you work.
Don’t rush through this process; take your time to ensure each shelf is aligned correctly. A level is your best friend in this scenario. Place it on top of each shelf as you go, adjusting until that bubble sits right in the middle. Perfect alignment achieved!
Ensuring Stability
With your shelves attached, it’s now crucial to ensure they’re stable and ready to hold whatever items you plan to store. But how do you make sure your adjustable storage shelves are up to the task?
Here are a few methods:
- Weight Capacity Assessment: Each type of wall anchor and shelf material has a specific weight capacity – remember when we talked about this earlier in the article? Well, now’s the time to revisit those numbers. Start by adding lighter items first, gradually increasing weight until you reach near capacity.
- The Wiggle Test: This one’s just as it sounds! Gently wiggle each shelf back and forth – there should be minimal movement if any at all.
- Visual Inspection: Look for any signs of strain or bowing in the shelves or standards once they’re loaded up.
If any of these tests indicate instability, don’t panic! It might just mean some minor adjustments are needed – perhaps realigning a shelf or tightening a screw.
Building adjustable storage shelves might seem like a daunting task, but with the right tools, materials, and a bit of patience, it can be quite an enjoyable project.
4. Additional Tips for Secure Installation: Ensuring Studs and Weight Distribution
When you’re working on your home improvement project, it’s important to pay attention to the small details. Mounting shelf studs and understanding weight distribution are two key factors in ensuring a secure installation. Let’s take a closer look at these aspects:
Locating Wall Studs: The Key to Heavy-duty Shelf Mounting
Before you start mounting your shelves, it’s crucial to find the wall studs. These are sturdy vertical beams behind your walls that provide strong support for heavy loads. Here’s what you need to do:
- Use an electronic stud finder to locate the studs accurately. This tool can detect changes in density and help you identify where the studs are located.
- Mark the stud locations with a pencil or masking tape. This will serve as a guide when you’re attaching the brackets or cleats for your shelves.
But what if there are no studs where you want to install your shelves? In such cases, you can use French cleats as an alternative solution:
French Cleats: A clever solution designed to distribute weight evenly across the wall surface. They consist of two pieces of timber cut at an angle. One piece attaches to the object being hung (in this case, the shelf), while the other fastens to the wall.
Balancing Act: Distributing Weight Evenly on Adjustable Shelves
Once your shelves are securely mounted, it’s time to arrange your items on them. However, it’s important to distribute the weight evenly to prevent any issues with sagging or instability. Here are some tips:
- Spread Out Heavy Items: Instead of placing all heavy items in one area or on a single shelf, distribute them across multiple shelves or along the length of a shelf.
- Middle Placement for Heavy Items: If you have particularly heavy objects, position them in the middle of the shelf. The ends of a shelf are typically the weakest points, so keeping the weight centered can help prevent sagging.
- Adjust Bracket Spacing: Take advantage of the adjustable brackets in your shelving system. If certain items are heavier than others, adjust the spacing between shelves to accommodate the additional weight.
Remember, achieving balance is key when it comes to installing shelves. By following these tips and paying attention to stud locations and weight distribution, you can create a secure and visually appealing storage solution for your home.
Now that we’ve covered these important aspects of shelf installation, you’re one step closer to achieving that perfect blend of functional storage and stylish decor.
Did You Know These Tips for Finding Studs and Using Wall Anchors?
When embarking on a DIY shelving project, getting to grips with finding studs and wall anchors is like unlocking a secret level in a video game – it can totally boost your shelving success! Here are some intriguing facts and techniques that might just make your day:
1. Magnet Magic
Bet you didn’t know that a simple magnet could be your stud-finding hero. Since most studs have metal nails or screws, running a magnet along the wall can help you pinpoint these hidden buddies. Just wait for the magnet to cling, and you’ve likely found a stud’s edge!
2. Acoustic Clues
Trust your ears! When tapping along the wall, listen for a solid sound rather than a hollow one. Solid sounds often indicate a stud lurking beneath the surface.
3. Consistent Spacing
Studs typically follow a standard spacing – 16 inches on-center in most homes, but sometimes 24 inches in others. Measure from a corner or around windows or outlets, and use this rhythm as your guide.
4. Wall Anchor Wisdom
Did you know that not all wall anchors are created equal? For instance, toggle bolts are amazing for heavy items because they spread weight across a larger area behind the drywall. On the other hand, plastic expansion anchors are great for lighter tasks.
5. Depth Dilemma
When using wall anchors, it’s crucial to drill to the right depth. If you drill too shallow, the anchor won’t secure properly; too deep and you risk weakening its hold. A piece of tape on your drill bit can act as a depth guide – now that’s what I call a nifty trick!
By incorporating these additional tips into your approach, you’ll be better equipped to handle any curveballs that DIY shelving might throw at you.
Conclusion
Ready to take on the world of adjustable storage shelves? Armed with the know-how to properly find studs and wield wall anchors like a pro, it’s your turn to transform that wall into a storage masterpiece. Imagine the satisfaction when those shelves come together, offering both sturdiness and style, all thanks to your handiwork.
Adjustable shelves aren’t just about putting stuff up and out of the way; they’re game changers in maximizing space efficiency. Whether it’s in a cozy home office or bustling commercial space, these versatile wonders let you personalize your area for peak organization and accessibility.
So grab those tools with a newfound confidence and let each screw turn guide you closer to a more organized, efficient space. Remember, every shelf you put up is a testament to your skill—and now, you’re totally equipped to make that happen. Happy building!
Citation
- Wilker Do’s. (2023, April 4). How To Build A Modern Wall Shelf In 7 Surprisingly Easy Steps! | Wilker Do’s. Wilker Do’s. https://wilkerdos.com/modern-wall-shelf-in-7-surprisingly-easy-steps/
- Jzbowmannz. (n.d.). Workshop Mobile Storage Unit With Adjustable Shelving: 5 Steps. Instructables. Retrieved February 16, 2024, from https://www.instructables.com/Mobile-Storage-Unit-Tool-Tower/
- Scott. (2019, February 5). How to make adjustable shelves with a shelf pin jig | Saws on Skates®. Saws on Skates. Retrieved February 16, 2024, from https://sawsonskates.com/make-adjustable-shelves-with-shelf-pin-jig/
- John, S. M. (2023, July 11). DIY Thick Adjustable Shelves – No Fancy Hardware — the Awesome Orange. The Awesome Orange. https://www.theawesomeorange.com/blog/diy-thick-adjustable-shelves
- Simplified Building. (n.d.). DIY Adjustable Shelving Units: How to Build Your Own. Simplified Building. Retrieved February 17, 2024, from https://www.simplifiedbuilding.com/projects/adjustable-shelving-units
FAQs(Frequently Asked Questions)
Choosing the right type of shelving and size is important because it affects how the shelves will hold up and function for your storage needs.
The material of shelves affects how they will hold up over time, so it’s essential to consider the durability of the material when choosing adjustable storage shelves.
Finding studs is crucial because they provide the necessary support for heavy-duty shelf mounting, ensuring the stability and safety of your adjustable storage shelves.
Some techniques for locating studs include using electronic stud finders, trusting acoustic clues by tapping along the wall, and looking for consistent spacing which is typically 16 inches on-center.
Common mistakes to avoid when using wall anchors include using drywall anchors where a stud is needed, as well as not drilling to the right depth when using wall anchors.
To ensure stability when mounting adjustable storage shelves, it’s important to distribute weight evenly on the shelves and use proper support systems, such as wall anchors and studs.

